Hello everyone!

I finally have a nail art tutorial for you. If you remember, back in the day, I used to do a lot of these, but for some reason I stopped. However, I really wanted to do something really cute and really simple for the spring, since it is the most beautiful season, plus it’s Easter tomorrow. So, happy Easter and let’s see what I did and how I did it!
Step 1
You know how I start every single nail art tutorial. You should take the old nail polish off, file your nails, push the cuticles, and make sure to wash your hands after that.

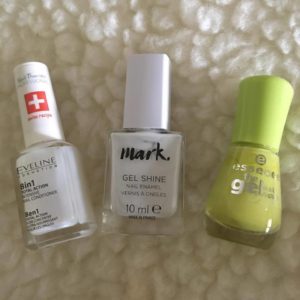
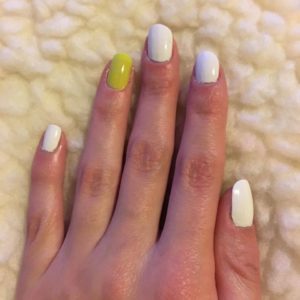
Then I applied a primer. For this, I decided to use the Eveline Cosmetics 8in1 treatment, which strengthens and whitens the nails at the same time. After that, I applied 2 coats of white nail polish by Avon’s new line called Mark. and it’s in the shade Iceberg White to each nail, except for the ring fingers.

On the ring finger, I decided to go with this very vibrant, bright green by Essence, the gel nail polish in the shade 27 don’t be shy!
Step 2

So, after my base was dry, I picked 7 different, springy and pastel colors. I dried the little brush as much as possible, by wiping it on the nail polish bottle, until very little nail polish was actually left on it. Then I made a little swipe with it on each of the nails, so that the brush stroke was visible. I repeated this step with all 7 colors.

Colors I used:
Blue- S-he stylezone in 399
Yellow- Essence the gel nail polish in 38 love is in the air
Lilac- Avon nailwear pro in luxe lavander
Orange- Catrice in 820 Pimp My Shrimp
Mint- Essence colour & go in 146 that’s what i mint!
Green- the same as for the ring finger base- Essence the gel nail polish in 27 don’t be shy!
Pink- Glamour by Yolizul in 182
Step 3
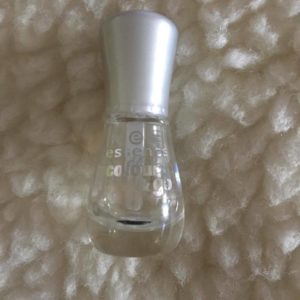
After my little brush strokes were all dried (which doesn’t take long at all), I sealed the design with a clear nail polish by Essence called 101 absolute pure.

And that’s it! I think it’s definitely the simplest nail design I ever did, but it looks stunning! Plus side is… absolutely everyone can do this. Also, you don’t have to use as many colors as I did, you can use different ones, you can use more, play with the shapes, add dots… You can do what ever your heart desires and it’s still going to look gorgeous!


I hope you enjoyed this post and Let me know if you ever decide to do this design yourself. Make sure you tweet me your photo, or tag me on Instagram. All of my social media is below!
Have you done a spring nail design? Do you enjoy doing your nails? Do you always have nail polish on? What is your favorite nail polish color?
Thank you for reading!
See you soon x
Follow me on Bloglovin | Instagram | Facebook | Twitter | Pinterest

